Learning Kubernetes with KubeADM - Part 1: Automate the creation of a homelab environment
Part 1 of our series on getting started with Kubernetes and kubeadm where we setup our homelab environment

Kubernetes has revolutionized how we deploy, manage, and scale containerized applications in production environments. As the de facto standard for container orchestration, Kubernetes provides powerful abstractions for managing complex distributed systems, from simple web applications to sophisticated microservices architectures. However, the learning curve can be steep for system administrators who are new to container orchestration.
kubeadm is Kubernetes’ official cluster lifecycle management tool that simplifies the process of bootstrapping production-ready clusters. Unlike managed services or complex installation tools, kubeadm provides a straightforward, standardized approach to cluster initialization that follows Kubernetes best practices.
In this tutorial series, we’ll use kubeadm to build a multi-node Kubernetes cluster from scratch, giving you hands-on experience with the fundamental concepts and operations that every Kubernetes administrator should understand.
If you’d like, you can find all the code for this tutorial at our GitHub repository, but I highly recommend you follow along and create the files yourself.
Prerequisites
Before we begin, you’ll need a Linux host machine (Ubuntu 20.04+ recommended) with virtualization capabilities. We’ll be using KVM/libvirt to create our virtual machines, so your system must support hardware virtualization (Intel VT-x or AMD-V).
Install the necessary virtualization packages:
sudo apt update && sudo apt install -y qemu-kvm libvirt-daemon-system libvirt-clients \
    bridge-utils virt-manager cloud-image-utils virtinst # Install the necessary packages

sudo usermod -aG libvirt $(whoami) # Add your user to the libvirt group

sudo systemctl enable --now libvirtd # Start libvirtd service
You may need to log out and log back in for these changes to take effect.
Confirm that the default libvirt network exists:
virsh net-list --allThe output of that command should look similar to this:
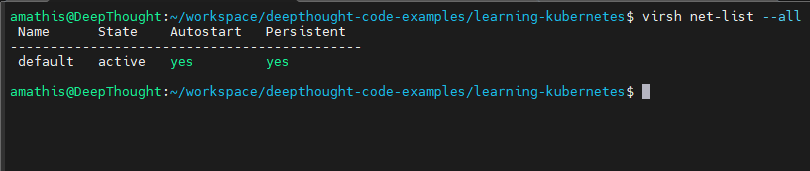
The default network should be in an active state with autostart and persistent set to yes.
Setting Up Our Environment
For this Kubernetes homelab, we’ll be building a virtualized cluster using libvirt on your local machine. The goal is to simulate a real-world Kubernetes setup, giving you hands-on experience with cluster management, networking, and node provisioning, all without the need for expensive hardware or cloud resources.
Our environment will consist of three virtual machines (VMs), each running Ubuntu Server 24.04. One VM will serve as the control plane (master node), responsible for orchestrating the cluster and managing workloads. The other two VMs will act as worker nodes, where containers and applications will be deployed.
This setup closely mirrors a production-grade Kubernetes cluster, allowing you to experiment with cluster operations, upgrades, and troubleshooting in a safe, reproducible way.
Minimum VM Specifications:
- CPU: 2 vCPU
- RAM: 4 GB
- Disk: 30 GB
- OS: Ubuntu Server 24.04
VM Roles:
- master-1: Control plane node (cluster management and API server)
- worker-1: Worker node (runs application workloads)
- worker-2: Worker node (runs application workloads)
By the end of this guide, you’ll have a fully functional Kubernetes cluster running locally, ready for further exploration and learning.
Start by creating our project directory:
mkdir learn-kubernetes
cd learn-kubernetes
Setting Up the Libvirt Storage Pool
Before we create our virtual machines, we need to establish a libvirt storage pool. A storage pool is a defined location on your host system where libvirt manages virtual disk images. This provides a centralized and permission-controlled way to handle your VM’s virtual hard drives and cloud-init ISOs.
We will create a pool named learning-kubernetes that points to your current working directory. This ensures that all your VM files are neatly organized within your project folder.
Prerequisites:
- Ensure
libvirt-daemon-system,libvirt-clients, andqemu-kvmare installed. - You are in the directory where you want your VM images to reside (e.g., ~/workspace/deepthought-code-examples/learning-kubernetes). We will use the PWD (Present Working Directory) environment variable in the commands below.
Steps to Create and Configure the Storage Pool:
Create the Pool Directory
Run the following commands to create the pool directory and assign it the correct permissions:
# Create the new target directory with appropriate permissions (Libvirt will manage this usually, but good to be explicit)
sudo mkdir -p /var/lib/libvirt/images/learning-kubernetes-pool/

sudo chown libvirt-qemu:kvm /var/lib/libvirt/images/learning-kubernetes-pool/

# Ensure only libvirt-qemu and kvm group can read/write/execute
sudo chmod 0770 /var/lib/libvirt/images/learning-kubernetes-pool/
Define the Pool in libvirt:
Use the virsh pool-define-as command to register this pool definition with libvirt. This makes libvirt aware of the pool.
# virsh pool-define-as <pool_name> <type> --target <current working directory>
sudo virsh pool-define-as learning-kubernetes dir --target /var/lib/libvirt/images/learning-kubernetes-pool/
Expected output: Pool learning-kubernetes defined
Build the Storage Pool:
The pool-build command initializes the target directory (if it doesn’t already exist as a libvirt managed pool) and sets the correct permissions for the libvirt-qemu user to read and write to it. This is crucial for avoiding permission errors later.
sudo virsh pool-build learning-kubernetesNote: If your directory already contains files, this might give a warning but usually proceeds.
Start the Storage Pool:
Once built, you need to start the pool to make it active and available for use by your VMs.
sudo virsh pool-start learning-kubernetesExpected output: Pool learning-kubernetes started
Set the Pool to Autostart (Highly Recommended):
To ensure your VMs’ disks are always available, even after your host machine reboots, set the pool to autostart.
sudo virsh pool-autostart learning-kubernetesExpected output: Pool learning-kubernetes marked as autostart
Verify the Pool Status:
Finally, confirm that your learning-kubernetes pool is now defined, active, and set to autostart.
virsh pool-list --allYou should see output similar to this:
 Name                State    Autostart   Persistent
----------------------------------------------------
 learning-kubernetes active   yes         yes
You can also inspect its full XML definition to confirm its target path:
virsh pool-dumpxml learning-kubernetesYour learning-kubernetes storage pool is now successfully set up and ready to manage your VM disk images within your working directory!
Automating VM Deployment Using Base Seed Image
Before we automate the entire process, it’s helpful to understand the general workflow for provisioning a virtual machine (VM) in libvirt using a base seed image. Let’s break down the steps required below:
-
Step 1. Prepare Cloud-Init Configuration: Each VM needs initial configuration, such as hostname, user accounts, and SSH keys, provided via cloud-init. This is done by creating two files:
user-data(for user and system settings) andmeta-data(for instance identity and hostname). These files ensure that, on first boot, the VM is set up exactly as needed for your Kubernetes cluster. -
Step 2. Generate the Seed Image: With your
user-dataandmeta-datafiles ready, you use a tool likegenisoimageto package them into a seed image. This image acts as a virtual CD-ROM, which the VM reads at boot to apply your configuration. -
Step 3. Import the Seed Image into Libvirt: To make the seed image accessible to libvirt, import it into your storage pool. This ensures the image is managed by libvirt and can be attached to your VM during creation.
-
Step 4. Create the VM with Virt-Install: Finally, use
virt-installto create the VM. Specify the base disk image (such as an Ubuntu cloud image), attach the seed image as a CD-ROM, and configure resources like CPU, RAM, and networking.
When the VM boots, cloud-init reads the seed image and applies your settings automatically.
This process, preparing cloud-init files, generating a seed image, importing it, and creating the VM, forms the foundation for automated provisioning. Understanding these steps makes it easier to appreciate the value of scripting and automation, which streamlines cluster setup and ensures consistency across all nodes.
To simplify the process, we can automate the creation of VMs using a script. This script handles everything from downloading the base image to creating and provisioning VMs.
Create a new file: create-vms.sh and let’s walk through an automated deployment:
Script Configurables
First, we need to set some script variables. This block contains all the user-configurable settings.
- BASE_IMG_FILENAME / UBUNTU_CLOUD_IMG_URL: Defines the Ubuntu Cloud Image to use as the base for all VMs.
- VM_NAMES: An array that sets the names and number of VMs to create.
- VM_IPS: An array of IP’s for the VMs to use
- SSH_PUB_KEY: Your public SSH key for passwordless access to the new VMs. You must replace the placeholder with the path to your key.
- VM_RAM / VM_VCPUS / VM_DISK_SIZE: Sets the memory (MB), vCPU count, and disk size (GB) for each VM.
- KUBE_POOL_NAME: The name of the libvirt storage pool where the VM disks will be created.
#!/bin/bash
set -e # Exit immediately if a command exits with a non-zero status.

# ---- Configurable ----
BASE_IMG_FILENAME="noble-server-cloudimg-amd64.img"
UBUNTU_CLOUD_IMG_URL="https://cloud-images.ubuntu.com/noble/current/noble-server-cloudimg-amd64.img"
VM_NAMES=("master-1" "worker-1" "worker-2")
VM_IPS=("192.168.122.101/24" "192.168.122.102/24" "192.168.122.103/24")
SSH_PUB_KEY="$(cat </PATH/TO/YOUR/SSH/KEY/.ssh/id_rsa.pub)" # IMPORTANT: REPLACE WITH YOUR ACTUAL PUBLIC SSH KEY
VM_RAM=4096
VM_VCPUS=2
VM_DISK_SIZE=30 # GB
KUBE_POOL_NAME="learning-kubernetes"    # The pool that we created
# ----------------------
Prerequisites and Base Image Setup
Next, we need to check for prerequisites and set up the base image before creating any virtual machines. First, we validate that the host environment meets the necessary virtualization requirements. Second, we acquire and properly stage the base operating system image for libvirt.
Validating the Host Environment
To run virtual machines with KVM (Kernel-based Virtual Machine), the host system’s CPU must support hardware virtualization extensions, specifically, Intel VT-x or AMD-V.
The script begins by ensuring these prerequisites are met:
- It first inspects /proc/cpuinfo, a file containing detailed processor information, for the vmx (Intel) or svm (AMD) flags. If these flags are not present, the CPU lacks the required features, and the script will exit with a descriptive error.
- Next, it confirms that the necessary KVM kernel modules are loaded. It uses
lsmodto check forkvm_intelorkvm_amd. These modules provide the interface between the kernel and the CPU’s virtualization capabilities. If they are not active, the script attempts to load them usingmodprobe.
Acquiring the Base OS Image
Our virtual machines will be provisioned from a standardized template known as a base image. For this purpose, we use an Ubuntu Cloud Image, which is a minimal, pre-built version of Ubuntu designed specifically for cloud and virtualization platforms.
The script handles the image download process efficiently:
- It first checks for the existence of the image file in a temporary directory (/tmp). This check prevents redundant downloads if the script is run multiple times.
- If the image is not found locally, the script uses wget to download it from the specified URL and saves it to the designated temporary path.
Importing the Image into the Libvirt Storage Pool
A downloaded image file must be properly registered with the libvirt management layer before it can be used to create VMs. This is done by importing it into a libvirt storage pool, which is a configured location that libvirt uses to manage storage volumes like VM disks.
The script follows a structured process to ensure the image is imported correctly:
- Check for Existence: It first queries the specified storage pool using virsh vol-list to see if a volume with the same name already exists. If it does, no action is needed.
- Perform Import: If the volume is not found, the script initiates an import procedure. This is a critical two-step process using libvirt’s own tools:
- First, it creates a new, empty storage volume in the pool with virsh vol-create-as. The volume is allocated with the exact size of the downloaded image file.
- Then, it uses virsh vol-upload to transfer the contents of the downloaded image file into the newly created volume.
Using vol-upload is the standard method for this task, as it ensures that libvirt correctly registers all metadata and permissions associated with the new storage volume.
Finally, once the image is securely imported into the storage pool, the temporary copy in /tmp is no longer required. The script removes this file to keep the filesystem clean.
Add the follow code to create-vms.sh:
echo "--- Checking Prerequisites and Downloading Base Image ---"

# Check for KVM acceleration (user friendly message)
if ! grep -E 'svm|vmx' /proc/cpuinfo &>/dev/null; then
  echo "ERROR: Your CPU does not support hardware virtualization (Intel VT-x or AMD-V)."
  echo "KVM acceleration will not be available. Please check your CPU capabilities."
  exit 1
fi

if ! lsmod | grep -E 'kvm_intel|kvm_amd' &>/dev/null; then
  echo "WARNING: KVM kernel modules are not loaded. Attempting to load them."
  sudo modprobe kvm_intel || sudo modprobe kvm_amd || { echo "Failed to load KVM modules."; exit 1; }
  sudo modprobe kvm || { echo "Failed to load KVM module."; exit 1; }
  sleep 2 # Give modules time to load
fi

# Define local path for temporary download (always download to /tmp or similar)
LOCAL_BASE_IMG_PATH="/tmp/$BASE_IMG_FILENAME"

# Download base image if not present locally
if [ ! -f "$LOCAL_BASE_IMG_PATH" ]; then
  echo "Downloading Ubuntu cloud image to $LOCAL_BASE_IMG_PATH: $UBUNTU_CLOUD_IMG_URL"
  # Use -O to specify the output filename and path directly
  wget -O "$LOCAL_BASE_IMG_PATH" "$UBUNTU_CLOUD_IMG_URL"
else
  echo "Local base image '$LOCAL_BASE_IMG_PATH' already exists. Skipping download."
fi

# Ensure base image is in the libvirt storage pool
echo "Checking base image '$BASE_IMG_FILENAME' in libvirt storage pool '$KUBE_POOL_NAME'..."
if ! virsh vol-list --pool "$KUBE_POOL_NAME" | grep -q "$BASE_IMG_FILENAME"; then
  echo "Importing base image '$BASE_IMG_FILENAME' into pool '$KUBE_POOL_NAME'..."

  # 1. Get the size of the local base image
  # Use du -b for bytes for more precision, as vol-create-as can take bytes
  IMG_SIZE_BYTES=$(sudo du -b "$LOCAL_BASE_IMG_PATH" | awk '{print $1}')

  # 2. Create an empty volume in the pool for the base image
  # Assuming qcow2 format for the base image
  sudo virsh vol-create-as "$KUBE_POOL_NAME" "$BASE_IMG_FILENAME" "${IMG_SIZE_BYTES}B" --format qcow2 || { echo "ERROR: Failed to create volume for base image. Exiting."; exit 1; }

  # 3. Upload the local base image into the newly created volume in the pool
  sudo virsh vol-upload --pool "$KUBE_POOL_NAME" "$BASE_IMG_FILENAME" "$LOCAL_BASE_IMG_PATH" || { echo "ERROR: Failed to upload base image. Exiting."; exit 1; }

  echo "Base image imported successfully into pool '$KUBE_POOL_NAME'."
else
  echo "Base image '$BASE_IMG_FILENAME' already present in pool '$KUBE_POOL_NAME'."
fi

# Clean up the locally downloaded base image after import
if [ -f "$LOCAL_BASE_IMG_PATH" ]; then
  echo "Cleaning up local downloaded base image: $LOCAL_BASE_IMG_PATH"
  rm "$LOCAL_BASE_IMG_PATH"
fi
VM Provisioning
Next, we will analyze the main loop of the script. During this loop, the script:
- Generates cloud-init configuration for each VM
- Creates and imports each cloud-init seed image into libvirt
- Installs each VM with
virt-install
Generating Per-VM Configurations with Cloud-Init
The provisioning process begins with a loop that iterates through each hostname defined in the VM_NAMES array, allowing us to configure each virtual machine individually. For this customization, the script leverages cloud-init, the industry standard for bootstrapping virtual machines on their first boot.
For each VM, the script dynamically generates the two necessary cloud-init configuration files: meta-data and user-data.
- The meta-data file is simple; it provides the instance with its unique identity by setting its hostname.
- The
user-datafile contains a more detailed set of instructions. It directs cloud-init to perform critical setup tasks, such as setting the timezone, injecting your specifiedSSH_PUB_KEYfor secure access, updating system packages, and installing essential tools like theqemu-guest-agent.
These files are written to a temporary directory. In the next step of the script, they will be packaged into a small ISO file that gets attached to the virtual machine, allowing cloud-init to apply our configuration automatically upon boot.
Add the follow code to create-vms.sh:
Important: Be mindful of the whitespaces when copying this code, extra whitespaces in will break these yaml files
echo "--- Starting VM Provisioning ---"

# Loop through each VM to create unique cloud-init data and install the VM
for i in "${!VM_NAMES[@]}"; do
  VM="${VM_NAMES[$i]}"
  CURRENT_IP="${VM_IPS[$i]}"

  echo "Processing VM: $VM with IP: $CURRENT_IP"

  # Define paths for temporary cloud-init files and the seed ISO
  TEMP_DIR="/tmp/cloud-init-$$" # Use $$ for a unique temporary directory for each run
  mkdir -p "$TEMP_DIR" || { echo "ERROR: Failed to create temporary directory $TEMP_DIR. Exiting."; exit 1; } # Added error handling for mkdir

  LOCAL_USER_DATA="${TEMP_DIR}/user-data"
  LOCAL_META_DATA="${TEMP_DIR}/meta-data"
  LOCAL_SEED_ISO="${TEMP_DIR}/seed-${VM}.iso" # Always create ISO, not .img

  # Define the volume name for libvirt pool (can be same as ISO filename)
  # It's best practice to keep the .iso extension for clarity in libvirt volumes
  SEED_VOL_NAME="seed-${VM}.iso"

  # 1. Create per-VM user-data and meta-data files in the temporary directory
  # This makes hostnames dynamic via cloud-init
  cat <<EOF > "$LOCAL_USER_DATA"
#cloud-config
preserve_hostname: false
hostname: ${VM}
manage_etc_hosts: true

# Set timezone
timezone: UTC

# Enable password authentication for debugging
ssh_pwauth: true
chpasswd:
  list: |
    ubuntu:ubuntu123
  expire: false

# User configuration
users:
  - name: ubuntu
    sudo: ALL=(ALL) NOPASSWD:ALL
    groups: users, admin, sudo
    shell: /bin/bash
    lock_passwd: false
    ssh_authorized_keys:
      - ${SSH_PUB_KEY}

# Disable root login but keep root account
disable_root: true

# Package updates and installations
package_update: true
package_upgrade: false
packages:
  - qemu-guest-agent
  - curl
  - wget
  - vim
  - htop

# Write files for SSH configuration
write_files:
  - path: /etc/ssh/sshd_config.d/99-cloud-init.conf
    content: |
      PasswordAuthentication yes
      PubkeyAuthentication yes
      PermitRootLogin no
    permissions: '0644'

# Commands to run after package installation
runcmd:
  - systemctl enable qemu-guest-agent
  - systemctl start qemu-guest-agent
  - systemctl restart sshd
  - cloud-init status --wait
  - echo "Cloud-init completed for ${VM}" > /var/log/cloud-init-complete.log
network:
  version: 2
  ethernets:
    eth0:
      dhcp4: false
      addresses:
        - ${CURRENT_IP}
      gateway4: 192.168.122.1
      nameservers:
        addresses: [8.8.8.8, 1.1.1.1]
# Final message
final_message: "Cloud-init setup complete for ${VM}. System is ready."

# Enable cloud-init debugging
debug:
  verbose: true

EOF

  cat <<EOF > "$LOCAL_META_DATA"
instance-id: ${VM}
local-hostname: ${VM}
EOF
Creating the Cloud-Init Seed ISO
Next, the script bundles the user-data and meta-data files into a bootable cloud-init seed ISO using the genisoimage command. This small ISO, which contains all our custom configurations, is then imported into the libvirt storage pool. To ensure the process is repeatable, the script first deletes any old seed ISO for the VM before uploading the new one.
Creating the VM Operating System Disk
Next, the script creates the main disk for the VM using an efficient method called copy-on-write (COW).
Instead of making a full, time-consuming copy of the base image, it uses qemu-img to create a new qcow2 disk that is linked to the original. This new disk only stores the changes made from the base image, which makes its creation nearly instantaneous and saves a significant amount of disk space. The disk is also set to the final size specified in the configuration variables.
Since this disk is created outside of libvirt’s direct control, the final virsh pool-refresh command is crucial. It tells libvirt to rescan the storage pool directory, discover the new disk, and make it available for the VM.
Add the follow code to create-vms.sh:
  # 2. Create cloud-init seed ISO image for the current VM in the temporary directory
  echo "Creating cloud-init seed ISO for $VM in $TEMP_DIR..."
  genisoimage -output "$LOCAL_SEED_ISO" -volid cidata -joliet -rock "$LOCAL_USER_DATA" "$LOCAL_META_DATA"

  # 3. Import the seed image (ISO) into the libvirt storage pool
  echo "Importing seed image '$SEED_VOL_NAME' into pool '$KUBE_POOL_NAME'..."
  # Remove existing seed volume if it's there for idempotency
  if virsh vol-list --pool "$KUBE_POOL_NAME" | grep -q "$SEED_VOL_NAME"; then
    echo "Removing existing seed volume '$SEED_VOL_NAME' from pool $KUBE_POOL_NAME"
    sudo virsh vol-delete --pool "$KUBE_POOL_NAME" "$SEED_VOL_NAME"

  # Calculate size of the ISO file
  SEED_SIZE_BYTES=$(du -b "$LOCAL_SEED_ISO" | awk '{print $1}')

  # Create an empty volume in pool with the correct size and raw format
  sudo virsh vol-create-as "$KUBE_POOL_NAME" "$SEED_VOL_NAME" "${SEED_SIZE_BYTES}B" --format iso || { echo "ERROR: Failed to create volume for seed image. Exiting."; exit 1; }

  # Upload local seed ISO image to the newly created volume in the pool
  sudo virsh vol-upload --pool "$KUBE_POOL_NAME" --vol "$SEED_VOL_NAME" "$LOCAL_SEED_ISO" || { echo "ERROR: Failed to upload seed image. Exiting."; exit 1; }

  # Clean up temporary local copies after upload
  echo "Cleaning up temporary cloud-init files in $TEMP_DIR..."
  rm -rf "$TEMP_DIR" # Remove the entire temporary directory
  fi

  # 4. Remove existing VM disk in pool if it's there (for idempotency)
  if virsh vol-list --pool "$KUBE_POOL_NAME" | grep -q "${VM}.img"; then
    echo "Removing existing VM disk '${VM}.img' from pool $KUBE_POOL_NAME"
    sudo virsh vol-delete --pool "$KUBE_POOL_NAME" "${VM}.img"
  fi

  # 5. Create new VM disk volume in the pool by cloning the base image using qemu-img
  echo "Creating VM volume '${VM}.img' (cloning from '$BASE_IMG_FILENAME') in pool '$KUBE_POOL_NAME' using qemu-img..."

  # Get the full path to the base image within the pool
  BASE_IMG_PATH_IN_POOL="$(sudo virsh pool-dumpxml "$KUBE_POOL_NAME" | grep -oP '(?<=<path>).*?(?=</path>)' | head -1)/$BASE_IMG_FILENAME"

  # Get the full path where the new VM disk will reside
  VM_DISK_PATH_IN_POOL="$(sudo virsh pool-dumpxml "$KUBE_POOL_NAME" | grep -oP '(?<=<path>).*?(?=</path>)' | head -1)/${VM}.img"

  # Use qemu-img create to create the COW (Copy-On-Write) clone directly
  # This makes a sparse qcow2 image backed by the base image.
  sudo qemu-img create -f qcow2 -o backing_file="$BASE_IMG_PATH_IN_POOL",backing_fmt=qcow2 "$VM_DISK_PATH_IN_POOL" "${VM_DISK_SIZE}G" || { echo "ERROR: Failed to create cloned VM disk using qemu-img. Exiting."; exit 1; }

  # IMPORTANT: Tell libvirt to refresh its pool so it detects the new file
  sudo virsh pool-refresh "$KUBE_POOL_NAME" || { echo "ERROR: Failed to refresh libvirt pool. Exiting."; exit 1; }
This final section of the script uses the previously created disk images to define, create, and boot the virtual machines.
Installing the Virtual Machine
The core of this section is the virt-install command, which creates and registers the VM with libvirt. Before running it, the script checks if a VM with the same name already exists. This makes the script idempotent, meaning it can be run multiple times without causing errors; it will simply start an existing VM if it’s already defined but shut off.
The virt-install command pulls together all our resources:
- It assigns the name, RAM, and vCPU count from our configuration variables.
- It attaches the two disks we prepared: the main OS disk and the cloud-init seed ISO as a virtual CD-ROM.
- The
--importflag is key, it tells virt-install to use the existing OS disk image rather than trying to perform a new OS installation. - Finally, flags like
--graphics none,--noautoconsole, and--autostartconfigure the VM to run as a headless server that starts automatically with the host.
Verifying and Connecting to the VM
After creating the VM, the script waits for a minute to allow the machine to boot and for cloud-init to apply its configuration.
It then enters a loop to retrieve the VM’s IP address from libvirt’s DHCP server. This retry mechanism makes the process more robust, as it can take some time for a new VM to acquire an IP.
Once the IP is found, the script provides the user with the address and SSH connection details. It also performs a quick SSH test to confirm that the VM is accessible. If anything fails, it prints helpful commands for manual troubleshooting.
Final Summary
After the loop has processed all the VMs, the script concludes by printing a summary of useful virsh commands for managing the new environment, such as how to list all VMs and check their network leases.
Add the follow code to create-vms.sh:
  # 6. Install the VM
  echo "Installing VM: $VM"
  # Check if VM already exists before attempting virt-install
  if virsh list --all | grep -w "$VM" &>/dev/null; then
    echo "VM '$VM' already exists. Skipping virt-install."
    # If it exists but is shut off, start it
    if virsh list --all --state shutoff | grep -w "$VM" &>/dev/null; then
      echo "VM '$VM' is shut off. Starting it..."
      sudo virsh start "$VM"
    fi
    continue # Skip to the next VM in the loop
  fi

  sudo virt-install \
    --name "$VM" \
    --ram "$VM_RAM" \
    --vcpus "$VM_VCPUS" \
    --disk "vol=$KUBE_POOL_NAME/${VM}.img,bus=virtio" \
    --disk "vol=$KUBE_POOL_NAME/$SEED_VOL_NAME,device=cdrom,bus=sata" \
    --os-variant ubuntu24.04 \
    --network network=default \
    --graphics none \
    --import \
    --noautoconsole \
    --autostart \
    --boot hd,cdrom

  echo "VM $VM created successfully."

  # Wait a moment for VM to start and then show connection info
  echo "Waiting 60 seconds for VM to fully boot and cloud-init to complete..."
  sleep 60

  # Get IP address with multiple attempts
  VM_IP=""
  for attempt in {1..5}; do
    echo "Attempt $attempt to get IP address for $VM..."
    VM_IP=$(sudo virsh domifaddr "$VM" --source dhcp 2>/dev/null | grep -oE '([0-9]{1,3}\.){3}[0-9]{1,3}' | head -1)
    if [[ -n "$VM_IP" ]]; then
      break
    fi
    sleep 10
  done

  if [[ -n "$VM_IP" ]]; then
    echo "VM $VM is accessible at IP: $VM_IP"
    echo "SSH with: ssh ubuntu@$VM_IP (password: ubuntu123)"
    echo "Or with key: ssh -i ~/.ssh/id_rsa ubuntu@$VM_IP"

    # Test SSH connectivity
    echo "Testing SSH connectivity..."
    if timeout 10 ssh -o ConnectTimeout=5 -o StrictHostKeyChecking=no ubuntu@$VM_IP "echo 'SSH connection successful'" 2>/dev/null; then
      echo "✓ SSH connection to $VM successful"
    else
      echo "⚠ SSH connection to $VM failed - cloud-init may still be running"
      echo "Check cloud-init status with: ssh ubuntu@$VM_IP 'sudo cloud-init status'"
    fi
  else
    echo "Could not determine IP for $VM. Check with: sudo virsh domifaddr $VM"
    echo "Or check DHCP leases: sudo virsh net-dhcp-leases default"
  fi
done

echo "--- VM Provisioning Complete ---"
echo ""
echo "To check VM status: sudo virsh list --all"
echo "To get VM IP addresses: sudo virsh net-dhcp-leases default"
echo "To check cloud-init status on a VM: ssh ubuntu@<VM_IP> 'sudo cloud-init status'"
Important: Before running the script, make sure to replace
YOUR_PUBLIC_SSH_KEY_HEREwith the path to your actual SSH public key.
Make the script executable and run it:
chmod +x create-vms.sh
sudo ./create-vms.sh
After the script completes, you should have three running VMs. You can verify this by running:
virsh list --allConfiguring VMs for Kubernetes
Now that our VMs are provisioned, we need to configure each one to run Kubernetes. This involves several system-level changes that are required for Kubernetes to function properly.
First, let’s get the IP addresses of our VMs so we can SSH into them:
virsh domifaddr master-1
virsh domifaddr worker-1
virsh domifaddr worker-2
You can SSH into each VM using the ubuntu user and the password “ubuntu” (or your SSH key if configured):
ssh ubuntu@<VM_IP_ADDRESS>Note: The github repository has a script called
all-nodes.shthat you can scp over to each node to handle the commands below that are to be applied on all vms.
Step 1: Disable Swap
Kubernetes requires swap to be disabled on all nodes. Swap can interfere with Kubernetes’ memory management and pod scheduling decisions.
Run these commands on all three VMs:
# Disable swap immediately
sudo swapoff -a

# Permanently disable swap by commenting out swap entries in /etc/fstab
sudo sed -i '/ swap / s/^\(.*\)$/#\1/g' /etc/fstab

# Verify swap is disabled
free -h
The free -h command should show “0B” for swap.
Step 2: Configure Container Runtime (containerd)
Kubernetes needs a container runtime to manage containers. We’ll use containerd, which is the recommended runtime for Kubernetes.
Run these commands on all three VMs:
# Update system packages
sudo apt update

# Install containerd and related packages
sudo apt install -y containerd apt-transport-https ca-certificates curl gpg

# Create containerd configuration directory
sudo mkdir -p /etc/containerd

# Generate default containerd configuration
sudo containerd config default | sudo tee /etc/containerd/config.toml

# Configure containerd to use systemd cgroup driver (required for kubeadm)
sudo sed -i 's/SystemdCgroup = false/SystemdCgroup = true/' /etc/containerd/config.toml

# Restart and enable containerd
sudo systemctl restart containerd
sudo systemctl enable containerd

# Verify containerd is running
sudo systemctl status containerd
Step 3: Load Kernel Modules and Set sysctl Parameters
Kubernetes requires certain kernel modules and system parameters to be configured for proper networking and functionality.
Run these commands on all three VMs:
# Load required kernel modules
sudo modprobe overlay
sudo modprobe br_netfilter

# Make modules load on boot
cat <<EOF | sudo tee /etc/modules-load.d/k8s.conf
overlay
br_netfilter
EOF

# Set required sysctl parameters
cat <<EOF | sudo tee /etc/sysctl.d/k8s.conf
net.bridge.bridge-nf-call-iptables  = 1
net.bridge.bridge-nf-call-ip6tables = 1
net.ipv4.ip_forward                 = 1
EOF

# Apply sysctl parameters immediately
sudo sysctl --system

# Verify the settings
lsmod | grep br_netfilter
lsmod | grep overlay
sysctl net.bridge.bridge-nf-call-iptables net.bridge.bridge-nf-call-ip6tables net.ipv4.ip_forward
Step 4: Install Kubernetes Components
Now we’ll install kubeadm, kubelet, and kubectl on all nodes.
Run these commands on all three VMs:
# Add Kubernetes repository signing key
curl -fsSL https://pkgs.k8s.io/core:/stable:/v1.31/deb/Release.key | sudo gpg --dearmor -o /etc/apt/keyrings/kubernetes-apt-keyring.gpg

# Add Kubernetes repository
echo 'deb [signed-by=/etc/apt/keyrings/kubernetes-apt-keyring.gpg] https://pkgs.k8s.io/core:/stable:/v1.31/deb/ /' | sudo tee /etc/apt/sources.list.d/kubernetes.list

# Update package index
sudo apt update

# Install Kubernetes components
sudo apt install -y kubelet kubeadm kubectl

# Prevent automatic updates of these packages
sudo apt-mark hold kubelet kubeadm kubectl

# Enable kubelet service
sudo systemctl enable kubelet
Step 5: Initialize Control Plane on master-1
Now we’ll initialize the Kubernetes control plane on the master-1 node. This step is only performed on the master node.
SSH into master-1 and run:
# Initialize the cluster with kubeadm
sudo kubeadm init \
  --pod-network-cidr=10.244.0.0/16 \
  --apiserver-advertise-address=$(hostname -I | awk '{print $1}')
The
--pod-network-cidrflag specifies the IP range for pod networking. We’re using 10.244.0.0/16 which is compatible with Calico CNI that we’ll install later.
Important: Save the kubeadm join command that appears at the end of the output. You’ll need this to join the worker nodes to the cluster. It will look something like:
kubeadm join 192.168.122.10:6443 --token <token> \
    --discovery-token-ca-cert-hash sha256:<hash>
Step 6: Setup kubectl on master-1
After initialization, configure kubectl to communicate with your cluster. Run these commands on master-1:
# Create kubectl configuration directory
mkdir -p $HOME/.kube

# Copy admin configuration
sudo cp -i /etc/kubernetes/admin.conf $HOME/.kube/config

# Set proper ownership
sudo chown $(id -u):$(id -g) $HOME/.kube/config

# Verify cluster status
kubectl get nodes
kubectl get pods -A
You should see master-1 in a “NotReady” state, which is expected because we haven’t installed a CNI plugin yet.
Step 7: Install CNI Plugin (Calico)
Container Network Interface (CNI) plugins enable pod-to-pod networking across nodes. We’ll use Calico as our CNI plugin because it fully supports Kubernetes NetworkPolicy.
This allows us to implement fine-grained traffic controls, including zero-trust defaults, between pods.
Run this command on master-1:
# Install Calico CNI
kubectl apply -f https://docs.projectcalico.org/manifests/calico.yaml

# Wait for Calico pods to be ready
kubectl wait --for=condition=ready pod -l k8s-app=calico-node -n kube-system --timeout=300s

# Verify all system pods are running
kubectl get pods -n kube-system
After a few minutes, master-1 should show as “Ready”:
kubectl get nodesStep 8: Join Worker Nodes
Now we’ll join the worker nodes to the cluster using the kubeadm join command from Step 5.
SSH into worker-1 and worker-2 and run the join command you saved earlier:
sudo kubeadm join 192.168.122.10:6443 --token <your-token> \
    --discovery-token-ca-cert-hash sha256:<your-hash>
If you lost the join command, you can generate a new one from master-1 using:
kubeadm token create --print-join-command
Step 9: Verify Cluster
Back on master-1, verify that all nodes have joined the cluster:
# Check all nodes are ready
kubectl get nodes

# Check node details
kubectl get nodes -o wide

# Verify system pods are running on all nodes
kubectl get pods -A -o wide

# Test the cluster with a simple deployment
kubectl create deployment nginx --image=nginx
kubectl expose deployment nginx --port=80 --type=NodePort
kubectl get svc nginx
You should see output similar to:
NAME     TYPE       CLUSTER-IP      EXTERNAL-IP   PORT(S)        AGE
nginx    NodePort   10.96.158.138   <none>        80:32268/TCP   5s
Test that the service is accessible:
curl http://$(hostname -I | awk '{print $1}'):32268If you see the nginx welcome page, congratulations! Your Kubernetes cluster is working correctly.
Cluster Verification and Testing
Let’s perform a few more tests to ensure our cluster is fully functional:
# Create a multi-pod deployment to test scheduling across nodes
kubectl create deployment test-app --image=nginx --replicas=3

# Wait for pods to be ready
kubectl wait --for=condition=ready pod -l app=test-app --timeout=300s

# Check pod distribution across nodes
kubectl get pods -o wide -l app=test-app

# Test DNS resolution within the cluster
kubectl run test-pod --image=busybox --rm -it --restart=Never -- nslookup kubernetes.default

# Check cluster health
kubectl get componentstatuses
kubectl cluster-info

# Clean up test resources
kubectl delete deployment test-app nginx
kubectl delete service nginx
Summary
Congratulations! You’ve successfully built a production-ready Kubernetes cluster from scratch using kubeadm. Let’s review what we’ve accomplished:
- Environment Setup: Created three Ubuntu VMs using libvirt and cloud-init for automated provisioning
- System Configuration: Disabled swap, configured containerd runtime, loaded kernel modules, and set networking parameters
- Kubernetes Installation: Installed kubeadm, kubelet, and kubectl on all nodes
- Cluster Initialization: Used kubeadm to bootstrap the control plane with proper networking configuration
- Networking: Deployed Flannel CNI for pod-to-pod communication across nodes
- Node Joining: Successfully joined worker nodes to form a multi-node cluster
- Verification: Tested cluster functionality with deployments and services
Your homelab Kubernetes cluster now provides:
- High Availability: Multi-node setup for resilience and load distribution
- Production Patterns: Standard kubeadm initialization following Kubernetes best practices
- Networking: Full pod-to-pod and service networking capabilities
- Extensibility: Ready for additional components like ingress controllers, monitoring, and storage
What’s Next?
This tutorial establishes the foundation for your Kubernetes learning journey. Your cluster is now ready for deploying applications, experimenting with Kubernetes features, and learning advanced concepts.
In Part 2 of this series, we’ll cover:
- Storage: Configuring persistent volumes and storage classes
- Ingress: Setting up NGINX ingress controller for external access
- Monitoring: Deploying Prometheus and Grafana for cluster observability
- Security: Implementing RBAC, network policies, and pod security standards
- Maintenance: Cluster upgrades, backup strategies, and troubleshooting
Further Reading
To deepen your Kubernetes knowledge, explore these resources:
- Official Kubernetes Documentation
- kubeadm Installation Guide
- Kubernetes Concepts
- kubectl Reference
- Container Network Interface (CNI)
Your homelab cluster provides an excellent environment for hands-on learning. Experiment with different workloads, explore Kubernetes features, and practice administration tasks. The foundation you’ve built here mirrors production environments, making your learning directly applicable to real-world scenarios.
Join us for Part 2, where we transform this basic cluster into a fully-featured Kubernetes platform with enterprise-grade capabilities.

Aaron Mathis
Systems administrator and software engineer specializing in cloud development, AI/ML, and modern web technologies. Passionate about building scalable solutions and sharing knowledge with the developer community.
Related Articles
Discover more insights on similar topics