Getting Started with C++: Setting Up Your Development Environment
Part 1 of our Software Development Series — Getting Started with C++. In this installment, we’ll install the necessary build tools, set up a modern C++ project structure, and automate the creation of new projects.

So you want to learn C++, you poor bastard. You’ve heard the whispers in the dark corners of the internet, the promises of raw power, of speed that could tear the chrome off a V8 engine.
They told you it was the language of the gods, the tool that built the digital world you take for granted. And they weren’t wrong. But they didn’t tell you about the blood, the sweat, or the existential dread that comes from staring into the abyss of a segmentation fault at 3 AM.
Forget those bloated, click-happy IDEs that hold your hand like a nervous child. We’re in the belly of the beast now, Linux. Here, you face the machine on its own terms. We’re going to grab a compiler, wire up a lean code editor, and forge a workflow that cuts through the noise like a straight razor.
Strap in. It’s going to be a hell of a ride…
The Toolkit: Arming Yourself to the Teeth
A lone compiler is not enough. To survive in the C++ wilderness, you need a full arsenal: a debugger to interrogate your broken code, powerful build systems to orchestrate the chaos, and analysis tools to keep your work sharp and clean. We’re installing the whole damn lot in one go.
Fire up your terminal. There is no mercy here. Open your terminal, that black box of truth,and run the command for your distribution.
For Debian/Ubuntu/Mint: Run this command to grab everything you need. It’s a potent cocktail of the GNU and LLVM toolchains, plus the essential build tools.
sudo apt update && sudo apt install -y \
    g++ \
    gcc \
    build-essential \
    cmake \
    make \
    gdb \
    ninja-build \
    clang \
    clang-tidy \
    clang-format
For Fedora/CentOS/RHEL: On Red Hat-based systems, we’ll start by grabbing the main development group, then snag the rest. It’s a two-stage attack.
First, the core tools:
sudo dnf groupinstall "Development Tools"This command installs GCC (g++), Make, GDB, and other foundational libraries.
Next, install the remaining high-powered gear:
sudo dnf install -y \
    cmake \
    ninja-build \
    clang \
    clang-tools-extra \
    clang-format
What Did You Just Install?
- g++, gcc, build-essential: The GNU Compiler Collection and essential libraries. The heart of your operation.
- cmake, make, ninja-build: Build systems. make is the grizzled veteran, ninja is the lightning-fast specialist, and cmake is the high-level strategist that generates files for both.
- gdb: The GNU Debugger. This is your interrogation lamp for figuring out why your brilliant code set the house on fire.
- clang, clang-tidy, clang-format: The LLVM/Clang toolchain. clang is an excellent alternative compiler, clang-tidy is a linter that screams at you when your code is sloppy, and clang-format is a digital valet that automatically cleans up your formatting.
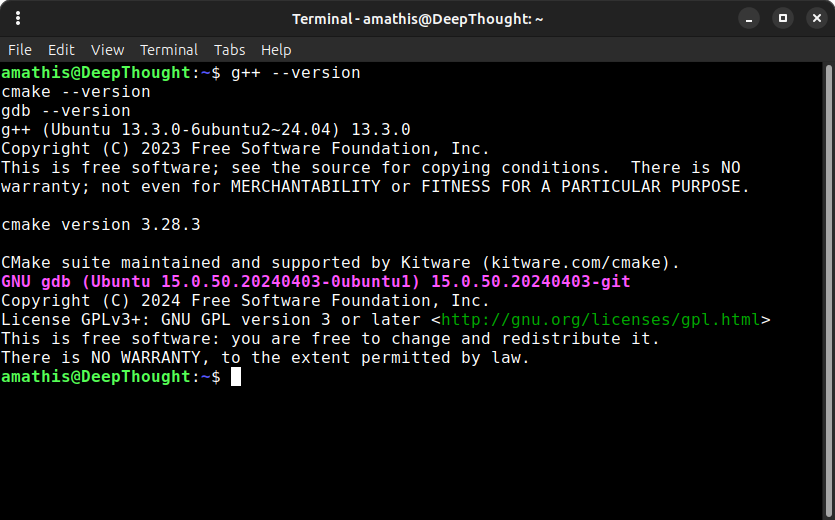
Verify a few key components to make sure they’re locked and loaded:
g++ --version
cmake --version
gdb --version
If you see version numbers, you’re ready for the next step. If not, something went wrong in the heat of battle, read the error messages and try again.
The Workbench (VSCode)
Excellent. Your system is now a bristling porcupine of command-line tools, but a pile of sharp objects is just a hazard until you have a proper place to work. You need a workbench.
We’re building ours with Visual Studio Code, and we’re getting the lumber straight from the source. Forget the cheap particle board from the Snap store or Flatpak; we’re using the official packages. This ensures you get timely updates directly from the belly of the beast in Redmond, the cleanest, strongest way to build your station.
Pick your poison.
For Debian, Ubuntu, or Any of Their Kin:
# First, install the necessary support packages
sudo apt-get install -y wget gpg
wget -qO- https://packages.microsoft.com/keys/microsoft.asc | gpg --dearmor > packages.microsoft.gpg
sudo install -o root -g root -m 644 packages.microsoft.gpg /etc/apt/trusted.gpg.d/

# Add the VS Code repository to your sources list
sudo sh -c 'echo "deb [arch=amd64,arm64,armhf signed-by=/etc/apt/trusted.gpg.d/packages.microsoft.gpg] https://packages.microsoft.com/repos/vscode stable main" > /etc/apt/sources.list.d/vscode.list'

# Clean up the key file
rm -f packages.microsoft.gpg

# Update the cache and install
sudo apt update
sudo apt install -y code
For RHEL, Fedora, CentOS
The Red Hat family has it easy. Microsoft provides a simple script to get the key and repository configured in one clean motion.
# Import the Microsoft GPG key
sudo rpm --import https://packages.microsoft.com/keys/microsoft.asc

# Add the Visual Studio Code repository
sudo sh -c 'echo -e "[code]\nname=Visual Studio Code\nbaseurl=https://packages.microsoft.com/yumrepos/vscode\nenabled=1\ngpgcheck=1\ngpgkey=https://packages.microsoft.com/keys/microsoft.asc" > /etc/yum.repos.d/vscode.repo'

# Update the package cache and install
sudo dnf check-update
sudo dnf install -y code
That’s it. The deed is done. You can now launch the editor from your desktop’s application menu or, like a pro, by typing one word into the terminal:
codeThe editor will spring to life. You have your workbench. In the next part, we’ll get it wired up.
Customizing the Workbench (Essential Extensions)
The workbench is assembled, but it’s just a flat piece of wood. A bare bench is useless. We need to stock it with the tools of the trade: the power tools for building, the precision instruments for measurement, and the vices to hold our work steady. We’re doing this from the command line, because there’s no time to wander the aisles of a digital hardware store. Open a fresh terminal. We’re piping these extensions directly into the editor’s brain stem with a single command.
The Installation Command
Execute this one-liner. It will grab the four essential extensions and bolt them into place.
code --install-extension ms-vscode.cpptools-extension-pack \
     --install-extension llvm-vs-code-extensions.vscode-clangd \
     --install-extension ms-vscode.cmake-tools \
     --install-extension formulahendry.code-runner
Wait for the terminal to finish its work. Once the dust settles, your editor will be armed with the following munitions.
Your New Arsenal Explained:
- C/C++ Extension Pack (ms-vscode.cpptools-extension-pack): This is the official Microsoft toolkit. It gives you basic debugging, code completion, and project navigation. It’s the standard-issue rifle they give all the new recruits.
- clangd (llvm-vs-code-extensions.vscode-clangd): This is the specialist’s tool. clangd provides lightning-fast and extremely accurate code analysis, completion, and error checking from the LLVM project itself. It runs circles around the default IntelliSense engine. You’ll want to configure your editor to use this as the primary language server for maximum velocity.
- CMake Tools (ms-vscode.cmake-tools): Your build system whisperer. This integrates CMake so deeply into VS Code that you can configure, build, and launch your debugger with a few clicks in the status bar. It turns the often-arcane process of managing a build into a push-button affair.
- Code Runner (formulahendry.code-runner): The big red button. Sometimes you don’t need a full build system. You just have one file and you need to see if it works now. This extension lets you execute a single source file with a keystroke (Ctrl+Alt+N). It’s the perfect tool for quick, frantic experiments.
Your editor is now a weapon. It’s time to load it.
The Blueprint: A Modern C++ Project
Every building needs a blueprint. A good project structure is the master plan that keeps your work from collapsing into a pile of rubble. It separates your source code, your build instructions, and your editor settings into clean, predictable locations.
Create a new project directory. Inside, you’ll lay out the following structure.
new-cpp-project/
├── .vscode/
│   ├── launch.json
│   ├── settings.json
│   └── tasks.json
├── src/
│   ├── main.cpp
│   ├── utils.cpp
│   └── utils.h
├── .clang-format
└── CMakeLists.txt.vscode/: This directory holds all the configuration files specific to Visual Studio Code. It tells the editor how to debug, build, and behave.src/: The heart of your project. All your .cpp and .h source files live here..clang-format: A simple text file that dictates your code’s style. It’s the law, ensuring every line of code is formatted consistently.CMakeLists.txt: The master build plan. This script tells the CMake build system how to take your source code and forge it into a runnable executable.
The Configuration Files
Create the following files with their corresponding content. This is the wiring and plumbing that makes the project tick.
.vscode/launch.json
This file configures the VS Code debugger. It tells the debugger what program to run (ModernCppApp), where to find it (${workspaceFolder}/build/), and to use GDB.
{
    "version": "0.2.0",
    "configurations": [
        {
            "name": "Debug C++ (CMake)",
            "type": "cppdbg",
            "request": "launch",
            "program": "${workspaceFolder}/build/ModernCppStarter",
            "args": [],
            "stopAtEntry": false,
            "cwd": "${workspaceFolder}",
            "environment": [],
            "externalConsole": false,
            "MIMode": "gdb",
            "setupCommands": [
                {
                    "description": "Enable pretty-printing for gdb",
                    "text": "-enable-pretty-printing",
                    "ignoreFailures": true
                }
            ],
            "preLaunchTask": "CMake Build",
            "miDebuggerPath": "/usr/bin/gdb"
        }
    ]
}
.vscode/tasks.json
This creates a simple, secondary build task you can run with Ctrl+Shift+B. It’s a quick-and-dirty way to compile the currently active file with g++, separate from the main CMake build.
{
    "version": "2.0.0",
    "tasks": [
        {
            "label": "g++ build active file",
            "type": "shell",
            "command": "/usr/bin/g++",
            "args": [
                "-g",
                "-pedantic-errors",
                "-Wall",
                "-Weffc++",
                "-Wextra",
                "-Wconversion",
                "-Wsign-conversion",
                "-std=c++23",
                "${file}",
                "-o",
                "${fileDirname}/${fileBasenameNoExtension}"
            ],
            "group": {
                "kind": "build",
                "isDefault": true
            },
            "problemMatcher": [
                "$gcc"
            ]
        }
    ]
}
.vscode/settings.json
This file contains settings specific to this project workspace. We’ll set the default build directory for CMake and tell the C/C++ extension where to find the compile_commands.json file, which is crucial for perfect IntelliSense.
{
	"cmake.buildDirectory": "${workspaceFolder}/build",
	"C_Cpp.default.compileCommands": "${workspaceFolder}/build/compile_commands.json",
	"C_Cpp.default.cppStandard": "c++23"
}
.clang-format
This file enforces a coding style. We’re using Google’s style guide as a base with a couple of tweaks. The clang-format tool will use this to automatically clean up your code.
BasedOnStyle: Google
IndentWidth: 4
ColumnLimit: 100
The Build Script
This is the most important file for your build process.
CMakeLists.txt
This script tells CMake that you’re creating a C++17 project named ModernCppApp. It then finds all your source files in the src directory and links them together into a single executable.
cmake_minimum_required(VERSION 3.10)
project(DeathRayApp)

set(CMAKE_CXX_STANDARD 23)
set(CMAKE_CXX_STANDARD_REQUIRED True)
set(CMAKE_CXX_EXTENSIONS OFF)

add_executable(DeathRayApp
    src/main.cpp
    src/utils.cpp
)
The Source Code
Finally, populate your src directory with some boilerplate code so you have a working foundation to build upon.
src/utils.h
The header file declares what functions are available.
#ifndef UTILS_H
#define UTILS_H

#include <string>

// A simple function declaration
std::string get_message();

#endif //UTILS_H
src/utils.cpp
The source file provides the actual implementation for the declared functions.
#include "utils.h"

std::string get_message() {
    return "A message from the utility belt.";
}
src/main.cpp
This is the entry point of your program. It includes the utility header and calls the function.
#include <iostream>
#include "utils.h"

int main() {
    std::cout << "The main program is running..." << std::endl;
    std::cout << get_message() << std::endl;
    return 0;
}
The Factory: Automating the Setup
You’ve crafted the perfect blueprint. Now it’s time to build the factory. The goal is to stamp out a fresh, ready-to-code project with a single command, automating the tedious setup process so you can get straight to work.
We’ll do this by archiving your template directory and then using a shell script to deploy and build it on command.
Step 1: Archive the Blueprint
First, we need to compress your new-cpp-project directory into a single, clean archive file. This is your master template. Navigate to the directory containing your new-cpp-project folder and run the following command:
tar -czvf new-cpp-project.tar.bz2 new-cpp-project/This command creates a bzipped tarball named new-cpp-project.tar.bz2. You now have a pristine copy of your project structure ready for deployment.
Step 2: The Deployment Script
Next, create the script that will act as your project assembly line. This script will take a project name, unpack the template, rename it, and run the initial CMake build.
Save the following code as new-project.sh. Make sure you save it in the same directory where you created new-cpp-project.tar.bz2.
#!/bin/bash

set -e

NAME="$1"
if [ -z "$NAME" ]; then
    echo "Usage: $0 <project-name>"
    exit 1
fi

echo "Creating project '$NAME'..."

TEMPLATE_ARCHIVE="new-cpp-project.tar.bz2"
if [ ! -f "$TEMPLATE_ARCHIVE" ]; then
    echo "[FAILURE] Template archive '$TEMPLATE_ARCHIVE' not found."
    exit 1
fi

echo "Extracting $TEMPLATE_ARCHIVE..."

# Extract template
tar -xjf "$TEMPLATE_ARCHIVE" || {
    echo "[FAILURE] Failed to extract template archive."
    exit 1
}

echo "Renaming extracted folder to '$NAME'/..."

# Rename folder
mv "new-cpp-project" "$NAME" || {
    echo "[FAILURE] Failed to rename template folder."
    exit 1
}

echo "Customizing project files with name '$NAME'...."

# Update CMakeLists.txt for the project and executable name
sed -i "s/project(ModernCppApp)/project($NAME)/" CMakeLists.txt
sed -i "s/add_executable(ModernCppApp/add_executable($NAME/" CMakeLists.txt

# Update the VS Code debugger configuration
sed -i "s/build\/ModernCppApp/build\/$NAME/" .vscode/launch.json

echo "Configuring and building project '$NAME'..."

# Enter project folder
cd "$NAME" || {
    echo "[FAILURE] Failed to change directory to '$NAME'."
    exit 1
}

# Fresh build folder
[ -d build ] && {
    echo "Removing existing build directory."
    rm -rf build
}
mkdir build && cd build || {
    echo "[FAILURE] Failed to create or change to build directory."
    exit 1
}

# Configure and build
cmake .. || {
    echo "[FAILURE] CMake configuration failed."
    exit 1
}

cmake --build . || {
    echo "[FAILURE] CMake build failed."
    exit 1
}
echo "[SUCCESS] Project '$NAME' created and built successfully."
echo "Navigate to it with: cd $NAME"
This script automates the entire setup:
- It checks that you provided a project name.
- It unpacks your .tar.gz archive.
- It renames the folder to your desired project name.
- It customizes the project files with your project name.
- It creates a build directory and runs both the cmake configuration and build commands.
Light the Fuse
Your factory is built. Your assembly line is ready. Time to see what this beast can do.
Arm the script. You only have to give it teeth once.
chmod +x new-project.shGive the order. Name your creation and let the script do the dirty work.
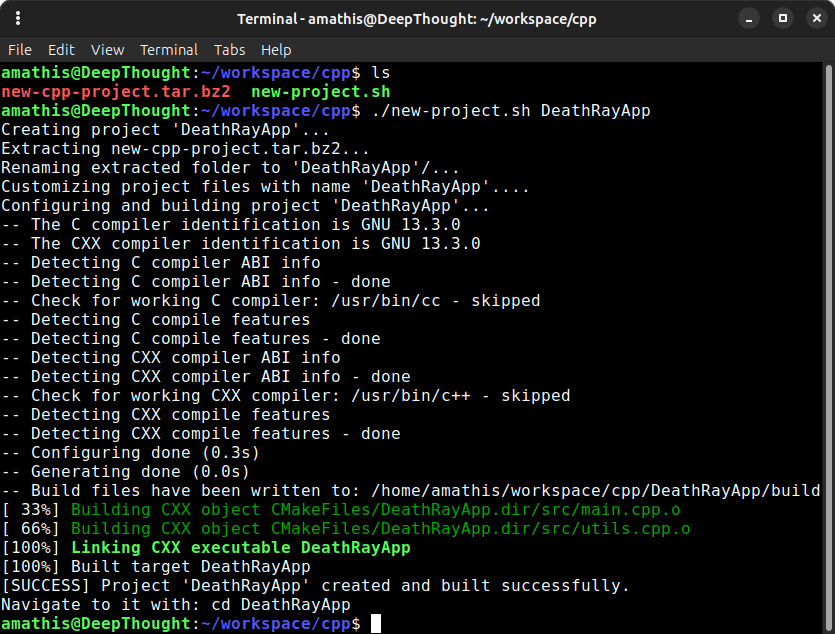
./new-project.sh DeathRayAppWatch it go. In moments, the machine will spit out a fully-formed, compiled project folder named DeathRayApp. The foundation is laid. The code is waiting. You didn’t just automate your setup; you built an engine for creation.
Into the Fire: A Conclusion
You started in the darkness with nothing but a command prompt. Now you have a fully armed and operational development environment. You’ve got the power-tools (g++, gdb), a custom-outfitted workbench (VS Code), a master blueprint for modern C++ projects, and a factory script to stamp out new applications on a whim.
Forget the hand-holding of bloated, all-in-one IDEs. This setup is different. It’s yours. It’s a lean, mean, viciously effective machine built from the ground up. You faced the terminal and bent it to your will.
The training wheels are off. The real work, the bleeding, the swearing, the glorious act of creation, starts now. So go on. Run your script, fire up the editor, and build something. The machine is waiting.

Aaron Mathis
Systems administrator and software engineer specializing in cloud development, AI/ML, and modern web technologies. Passionate about building scalable solutions and sharing knowledge with the developer community.
Related Articles
Discover more insights on similar topics